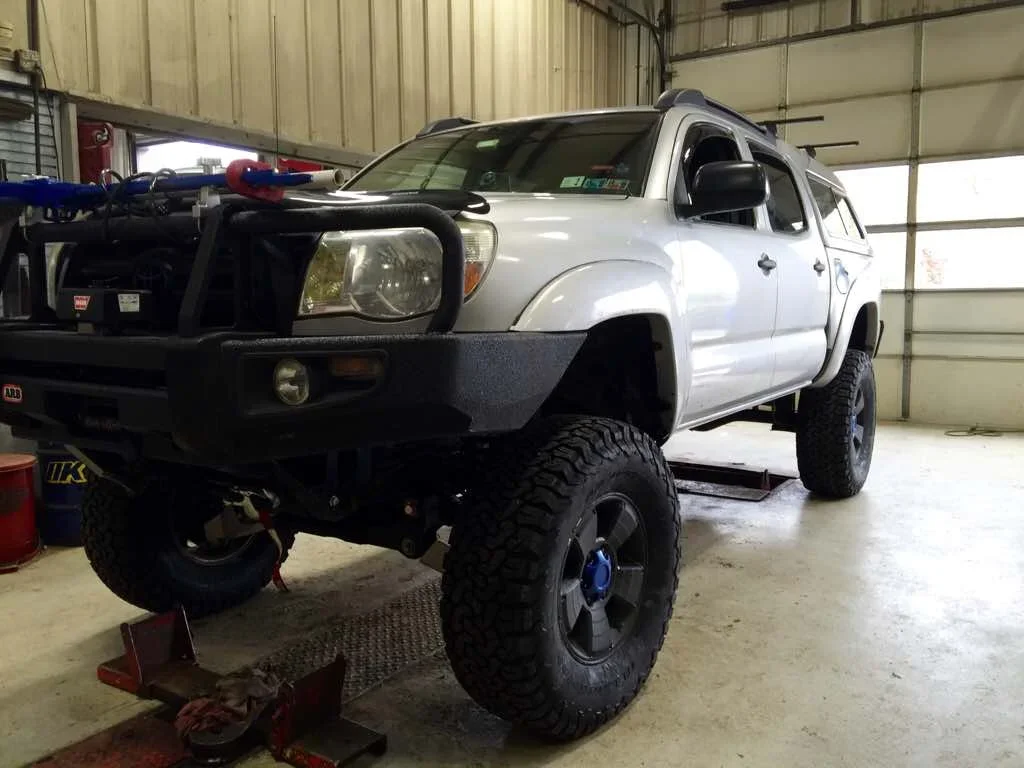
What makes your truck unique?

Nice. I'll do some reading. Thinking about getting night vision in the front. Thanks for the info.
I have a camera with a dozen or so IR LEDs on the front, so I can see at night. Same cameras under carriage give me the ability to see obstructions at night as well. The challenge is finding cameras that are robust enough that handle immersion and normal trail "stuff". I am about to order a couple more and plan to plasti-dipped them before putting them into service. Those advertised as water proof are maybe not as good as you might like. Pay attention to the ISO standard ratings.
 
Interesting. Thanks for the advice. I'd like to do it right the first time if possible. Do you have any pictures of your setup or what it allows you to see through your display?
 
Interesting. Thanks for the advice. I'd like to do it right the first time if possible. Do you have any pictures of your setup or what it allows you to see through your display?
I posted all that on another forum, but here's a dump:

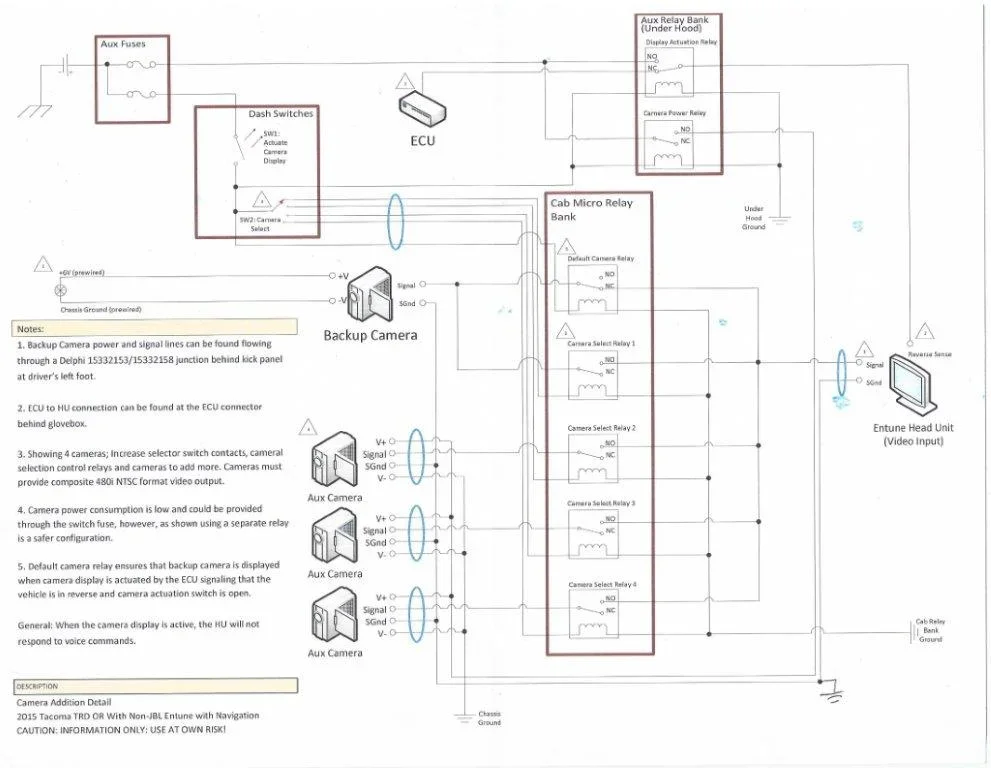
Here's the electrical schematic, give or take...
Scan0003.jpg

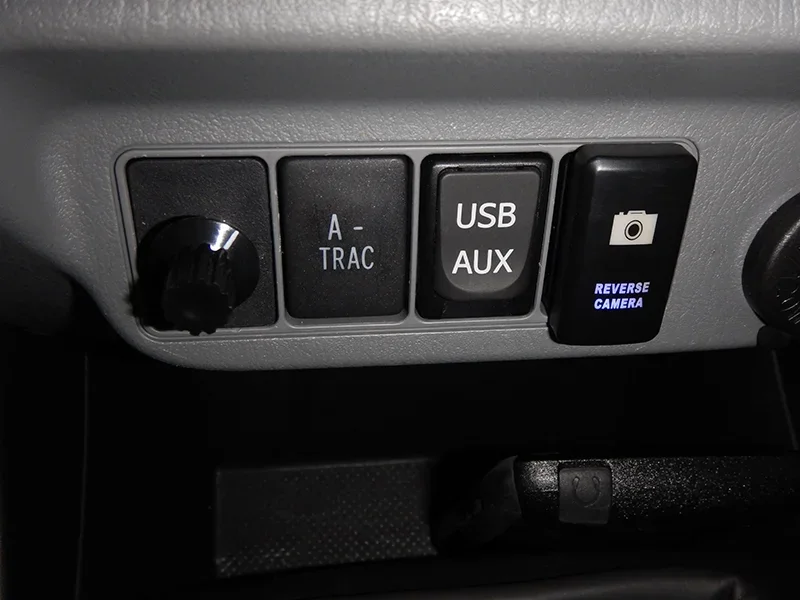
I added an auxiliary fuse/relay box under the hood for this and other mods. There are two switches added to the dash, above the center console. One switch is the overall on/off which trips a relay to power the cameras, trips a relay to put 12 volts to the HU to toggle to camera display, and also provides actuation power through a 6-position selector switch that triggers a relay bank to pick the desired camera to display. You will note that the backup camera runs through a NC on relay 1, so if the camera on/off switch is off, putting the truck in reverse, you get the backup camera regardless of the selector switch position. Selector switch is the unlabled switch on the left, and the "reverse camera" is the main power switch.

20150823_AW130_0015.jpg

The cameras I added are all Boyo VTC301C cameras. They are supposed to be 170-deg, but I am not sure I'm seeing 170 on the display, possibly due to format. I like them from the robust design, but they are not as water-tight as advertised (surprising 'cause when you take them apart, the seem like they should be better). Two of my three leaked going through deep puddles (or from the pressure washer?) and I have since taken them apart, dried them out, and made sure they were fully sealed up.

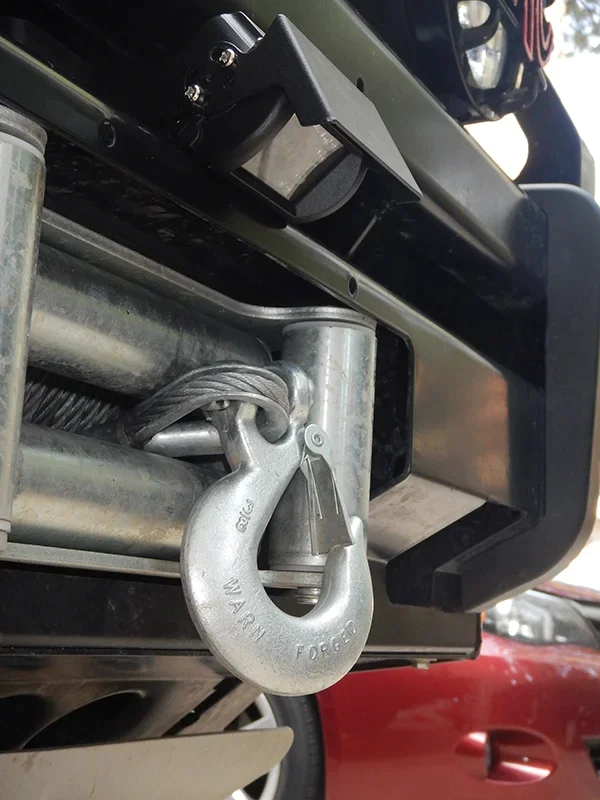
First camera is on the front looking pretty much down. I use this one all the time! Makes parking much easier, and takes surprises out of that break over on the trails.
20150823_AW130_0008.jpg
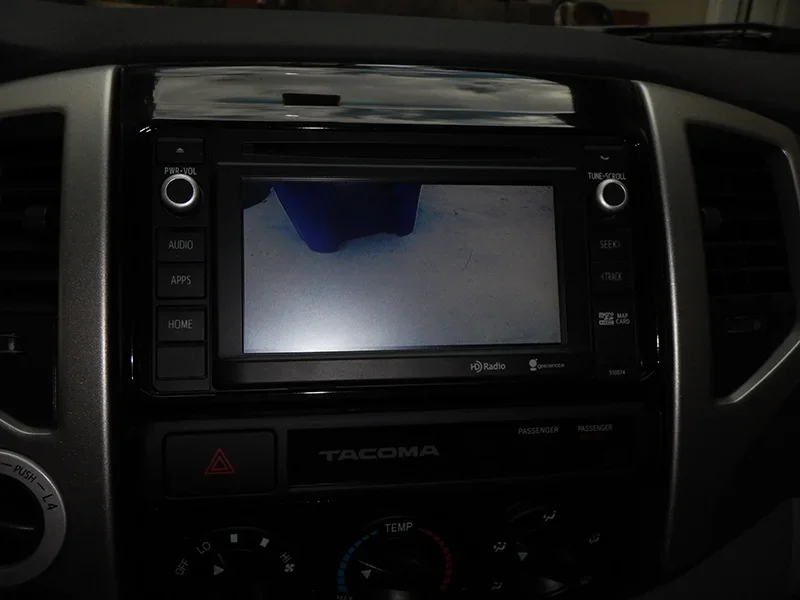
This is the view on the HU display from the front camera. I want something a bit wider, but it really is very helpful nonetheless.
20150823_AW130_0016.jpg

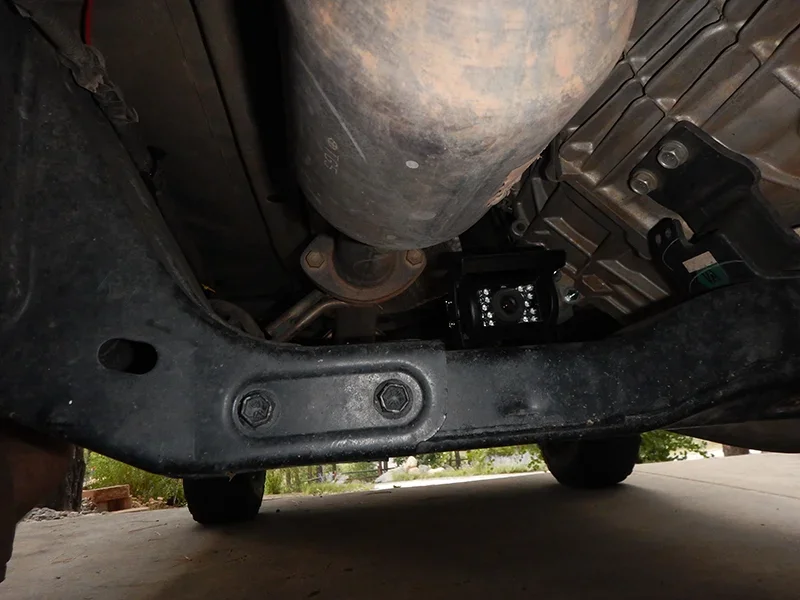
Another is near the transfer case looking forward towards the bottom of the skid plate, and also the lower control arms. This one has been the most prone to issues. It gets a lot of punishment on the trail from flying debris, gets some heat from the exhaust line, and is also the lowest of the three added cameras, so it gets the most water. (I am thinking of adding a plexi shield or something in front of it.)


20150823_AW130_0014.jpg

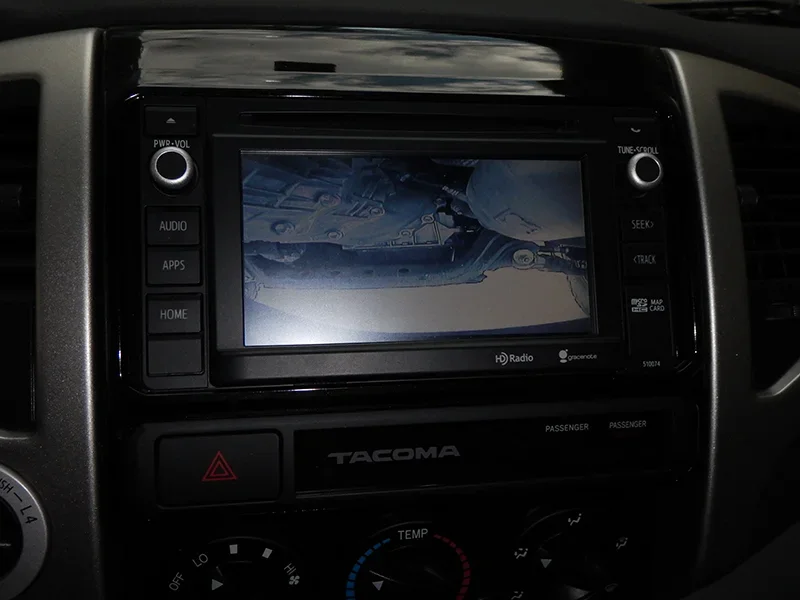
This camera gives me this view. Again, a bit wider view would be nice, but I can still see each tire, lower control arms, and the bottom of the skid plate.
20150823_AW130_0017.jpg

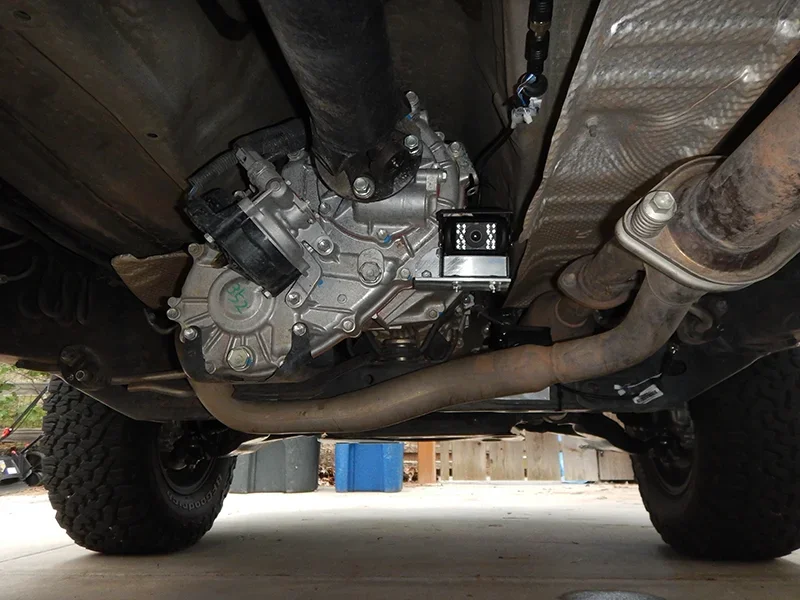
The third camera is near the second, but looks backwards, with a mirror image. It's mounted on a plate I attached to the transfer case.
20150823_AW130_0013.jpg

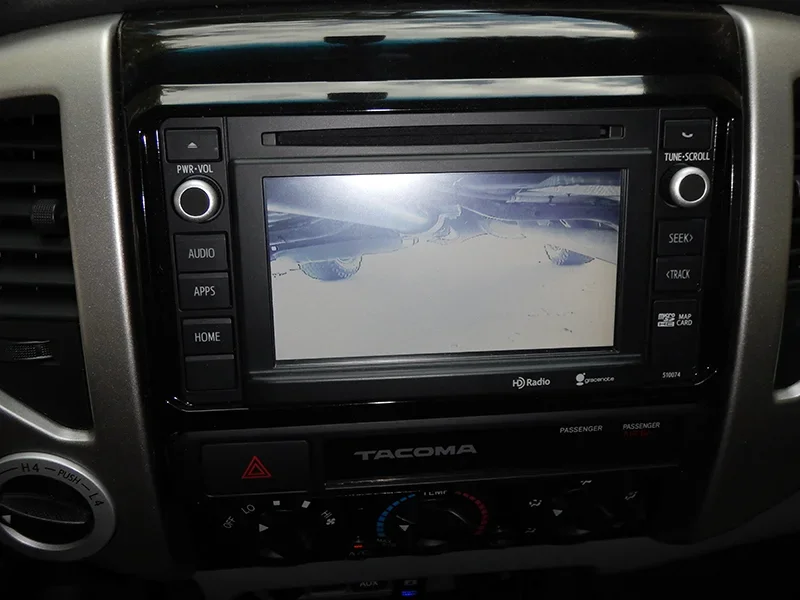
And the view:
20150823_AW130_0019.jpg
Of course, I still have the backup camera as a selection, and I have everything in place to add up to two more cameras (or maybe put an RCA plug in the console to allow any feed to be run through the HU).

The main relay bank is placed under the center console, right behind the shifter (I have a manual) and in front of the cup holders, where I was able to bolt it down using some existing connection points. The signal lines to the cameras run through the floor plug that's under the center console.

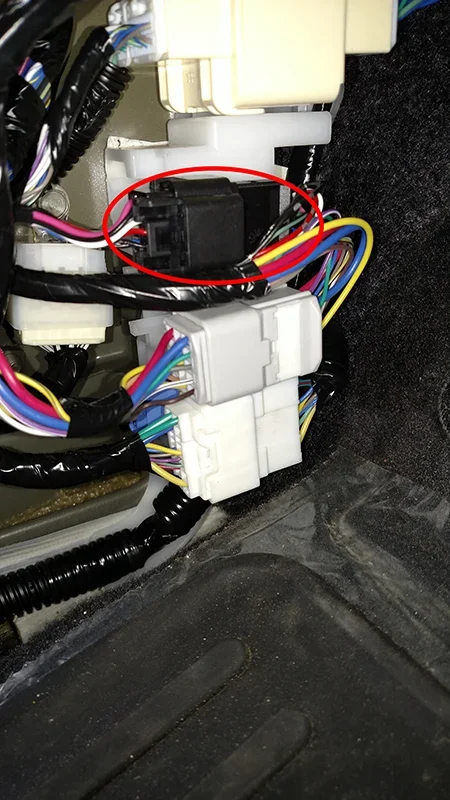
To tie the video output from the relay bank to the HU, I located the backup camera video feed behind the left front access panel (the red wire in the black delphi connector shown below). I bought a set of these connectors and made a harness so I didn't have to cut any wires. In hindsight, I probably would have just extracted the one connector and made a simpler and cheaper harness.
IMG_20150807_144315947.jpg

The HU reverse sense is found over behind the glovebox, but I can't seem to find any pictures right now. It's one wire in one of the ECU output connectors.


Attachments

  • 20150823_AW130_0020.jpg
    20150823_AW130_0020.jpg
    231.7 KB · Views: 66
Wow. Thanks for all the detail. I will look for the thread if I have any more questions. This should be more than enough to get me started.
 
I posted all that on another forum, but here's a dump:

Here's the electrical schematic, give or take...
View attachment 6892

I added an auxiliary fuse/relay box under the hood for this and other mods. There are two switches added to the dash, above the center console. One switch is the overall on/off which trips a relay to power the cameras, trips a relay to put 12 volts to the HU to toggle to camera display, and also provides actuation power through a 6-position selector switch that triggers a relay bank to pick the desired camera to display. You will note that the backup camera runs through a NC on relay 1, so if the camera on/off switch is off, putting the truck in reverse, you get the backup camera regardless of the selector switch position. Selector switch is the unlabled switch on the left, and the "reverse camera" is the main power switch.

View attachment 6893

The cameras I added are all Boyo VTC301C cameras. They are supposed to be 170-deg, but I am not sure I'm seeing 170 on the display, possibly due to format. I like them from the robust design, but they are not as water-tight as advertised (surprising 'cause when you take them apart, the seem like they should be better). Two of my three leaked going through deep puddles (or from the pressure washer?) and I have since taken them apart, dried them out, and made sure they were fully sealed up.

First camera is on the front looking pretty much down. I use this one all the time! Makes parking much easier, and takes surprises out of that break over on the trails.
View attachment 6894
This is the view on the HU display from the front camera. I want something a bit wider, but it really is very helpful nonetheless.
View attachment 6898

Another is near the transfer case looking forward towards the bottom of the skid plate, and also the lower control arms. This one has been the most prone to issues. It gets a lot of punishment on the trail from flying debris, gets some heat from the exhaust line, and is also the lowest of the three added cameras, so it gets the most water. (I am thinking of adding a plexi shield or something in front of it.)


View attachment 6896

This camera gives me this view. Again, a bit wider view would be nice, but I can still see each tire, lower control arms, and the bottom of the skid plate.
View attachment 6899

The third camera is near the second, but looks backwards, with a mirror image. It's mounted on a plate I attached to the transfer case.
View attachment 6897

And the view:
View attachment 6900
Of course, I still have the backup camera as a selection, and I have everything in place to add up to two more cameras (or maybe put an RCA plug in the console to allow any feed to be run through the HU).

The main relay bank is placed under the center console, right behind the shifter (I have a manual) and in front of the cup holders, where I was able to bolt it down using some existing connection points. The signal lines to the cameras run through the floor plug that's under the center console.

To tie the video output from the relay bank to the HU, I located the backup camera video feed behind the left front access panel (the red wire in the black delphi connector shown below). I bought a set of these connectors and made a harness so I didn't have to cut any wires. In hindsight, I probably would have just extracted the one connector and made a simpler and cheaper harness.
View attachment 6902

The HU reverse sense is found over behind the glovebox, but I can't seem to find any pictures right now. It's one wire in one of the ECU output connectors.

How much did this cost and how many hours of your time?
 
How much did this cost and how many hours of your time?
Probably less than you think. About $300 to $350 ballpark, since I already had the auxiliary fuse/relay box under the hood. Biggest cost is cameras, and i kept that cost low in case things went south on the trail. I spent some prep time here and there, and one solid day installing. Before I jumped in, I spent quite a few hours researching and planning so I knew exactly what I had to do once I did start.
 
Not bad at all! I've got a two year electronics degree from twenty years at one time would be able to boils my own circuit boards. No need for that these days! I've got an older 07 Double Cab I bought nine months ago. I've done many of the mods myself and after today BDS 6" lift with some 35"x12.5" BFG KO2's I'll have about $20,000 into it after the $18,500 I paid for it. I could have bought a new one for 31-35K , but, after mods I'd be high 40's. Whatever floats your boat I guess. Enjoy!
 
I wonder how hard it would be to make an air box that feeds off of that scoop. I'm not sure if there is enough room or if you'd get enough airflow though..
 
I wonder how hard it would be to make an air box that feeds off of that scoop. I'm not sure if there is enough room or if you'd get enough airflow though..

I've thought about making the scoop an intake, but didn't have the time to do so or the willingness to do something that might not even work, although I think next summer I might open it to make it functional...
 
The '05-'11 hood scoops were as simple as detaching the "screen". '12 and newer are narrower and have a backing to the "screen" that serve best to attach a small light bar at best. If you really want, you can cut the back of it out and sand the rough spots. Not worth it in my opinion...
 
Yeah, I popped my hood a few minutes ago to take a look. Doesn't look like you can turn back once you start that job.
 
Back
Top